March 13, 2014
Why conventional measuring arms will not overcome...
CONTROL 2014: Hall 5, Booth 5108 & Hall 1, Booth 1302
Leinfelden-Echterdingen, March 13, 2014 – Creaform, a leader in portable 3D measurement solutions and metrology services, will be presenting the latest in optical 3D measurement technology at CONTROL 2014.
Over the past 30 years, one of the most important changes in metrology has been the development of portable measuring devices that bring inspection right into the production line, as close to the part as possible. This change—sparked by the development of portable measuring arms in the early 1990s and the emergence of laser trackers shortly after—turned conventional industry inspection methods completely upside down. It also made it possible to take measurements more quickly and more often, fostering huge improvements in response time and quality. Far from the comfort of metrology labs where qualified inspectors operate digital CMMs with their heavy, stable granite table, portable measurement is still facing several major challenges.
Obstacles
In production environments the use of portable measurement solutions meets with obstacles every day that affect results: Production equipment can generate permanent vibrations, rigid measurement system set-up is not guaranteed, temperature and humidity levels are subject to change, and user skill and experience vary.
TRUaccuracy technology and dynamic referencing
Featuring TRUaccuracy technology and dynamic referencing, Creaform systems generate guaranteed high accuracy results regardless of the measurement environment (instability, vibrations, thermal variation, etc.) and operator skills. Gone are the days when rigid measurement set-up or measurement rooms were needed.
HandyPROBE portable CMM
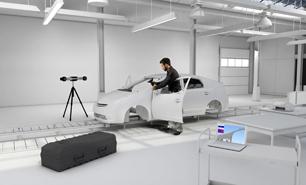
The HandyPROBE portable CMM arm-free measurement system is the alternative to traditional measurement arms. The HandyPROBE is a wireless, triangulation–based CMM that offers complete freedom of movement and can be used for single or repeated measurements of various parts.
The CMM is tracked by C-Track dual-camera sensors. C-Track sensors also ensure the exact localization of the HandyPROBE, perform continuous image acquisition and transmission, provide lighting of reflectors, manage exchanges with the computer and store sensor parameters. When the HandyPROBE is networked with 2 to 4 C-Tracks, the CMM gives access to C-Link. This functionality makes it possible to network with up to 4 C-Track camera sensors and operate them simultaneously with the HandyPROBE portable CMM or the MetraSCAN 3D optical 3D scanner. C-Link is a mobile measurement solution that creates a virtual measurement room in any area, in order to measure or scan complex setups, jigs, tooling or prototypes faster and easier than ever before. In combination with the VXtrack dynamic tracking module, C-Link can be used for large or complex object deformation analysis.
3D scanners & automated inspection
In addition to portable CMMs, Creaform offers a wide range of scanning solutions also featuring TRUaccuracy technology and dynamic referencing. This gives Creaform scanner users the benefit of portable measurement equipment they can simply bring to the part they need to measure. The Go!SCAN 3D, Handyscan 3D and MetraSCAN 3D white light scanners are ideal for performing 3D inspection, quality control, reverse engineering, CAD comparison, 3D modelling and conformity assessment tasks.
For automated inspection, Creaform offers the MetraSCAN-R robot-mounted scanner. This fast and accurate scanning solution is designed for 3D automated inspection of parts on the production line and on the shop floor. It can be integrated into factory automation projects and guarantees optimal dimensional measurement accuracy and speed.
At CONTROL 2014, Creaform will be introducing and showcasing several new groundbreaking solutions, and invites visitors to come discover what makes Creaform the industry reference for 3D portable measurement technologies.
