


April 15, 2024
Use of 3D scanner increases efficiency and reduces labor and material costs See the articlePinkbike, the world’s largest mountain bike community and a first reference in mountain bike, called upon the services of Creaform, who teamed up to undertake a suspension analysis journey for the benefit of users and readers from around the globe. Their latest blog series, led by engineer-slash-rider Dan Roberts, is called “Behind the Numbers,” a content category dedicated to in-depth suspension analyses.
Amidst the abundance of technical information and product data, the blog’s contributors were looking for new technologies to analyze short-linked mountain bikes such as the Santa Cruz Megatower in a faster and more efficient manner (i.e., measuring suspension curves, head angle, bottom bracket height, sag, etc.). At that point—fun story—Dan Roberts, while working from Switzerland, reached out to our company, which develops, produces and puts to market metrology instruments such as 3D scanners and reverse engineering software.
Although the geographical distance would have been a good enough reason to put the Creaform-Pinkbike venture to sleep, Roberts’s geek mind was already aroused. The project could thus go forth, for the sake of passionate bikers with a thirst for tech content and accurate data.
Below is Pinkbike’s metrology journey towards accurate measurements and reliable data for bike lovers.
Since the links define the instant centre position, even minor changes to the pivot points of short-linked bikes can have a drastic effect on the bike’s character. The team sums it as follows: “Up until the Megatower we had been analyzing relatively long-linked bikes, and so our degree of accuracy when taking measurements was more than enough for those layouts.”
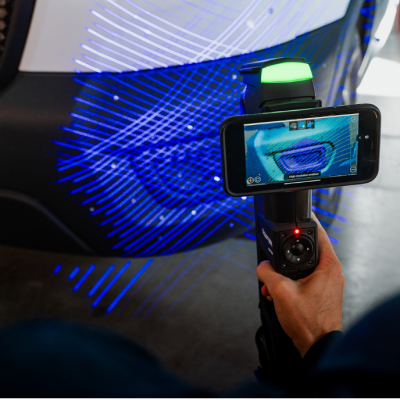
Creaform was keen to support Dan Roberts in his efforts to make available rich and accurate suspension digits and data for avid readers looking for the real deal when it comes to biking. In the metrology industry, we offer particularly fast scanning instruments. Not only do our tools allow for a quick setup and a fast scan without surface preparation, the amount of time required to go from positioning targets to toying around with the 3D rendering is remarkably short.
And so, the team set out to find a Santa Cruz Megatower for the analysis. As luck would have it, the Mathieu Performance bike shop in Québec City (a few kilometres from Creaform’s head office) had a Megatower readily available for measurement in stock.
Now onto the actual mission: the Creaform team was tasked with going to said bike shop, measuring the pivot points, axles and tubes of the fork and seat post, and extracting their geometry. With that in mind, scanner portability was a staple feature, no excuses. Creaform was thus the most fit, convenient party to help in that matter.
Using 3D scanning technologies for this project also meant chasing for volumetric positioning accuracy, and the solution has delivered results in that matter, with an accuracy of 0.1 mm for distances ranging from one end of the bike to the other. Little did they know, this proved more than enough for the analysis and a tad finer compared to the manufacturing tolerances achievable in the bike industry.
1- Setting Up Quickly and Creating a Reference Frame
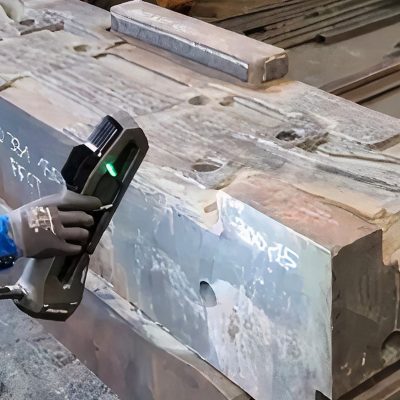
Installing the equipment for this project—and any other project for that matter—did not require rigid, static and/or cumbersome equipment: the bike stood before a cardboard box on which the team applied positioning targets.

Positioning targets are paper-like reflective stickers used to create a reference frame for the 3D scanner to position itself in space. They can be placed on the object being scanned or in its immediate surroundings. To make sure the tracking was optimal, some additional targets were required.
In order to generate a mesh, the scanner should have at least three targets at all times in its field of view, but since the geometry and material volume of a bike are generally sparse, a cardboard box was put behind the bike to affix more targets.
The HandySCAN 3D has a field of view of approximately 30 cm X 35 cm, so this means that targets should be positioned every 2-6 inches, in a random fashion. In the present case, they were positioned relatively close to one another, both on the carboard box and on the bike itself, since some components of the whole object being scanned displayed complex geometries, distinct features and various textures.
2- Redefining Accuracy in Scanning Mountain Bike Suspensions
Creaform’s HandySCAN 3D—which was used for the short-linked bike suspension analysis—boasts a 0.025 mm local accuracy. This means that a scan of the bike performed using the HandySCAN 3D could highlight even the slightest discrepancies between the design tolerances and specifications, according to the manufacturer, and those of the actual bike. In other applications such as quality control during the manufacturing of the bikes, such a level of accuracy is not only enviable, but also desirable!
3- Mesh: Calculating, Building, Processing
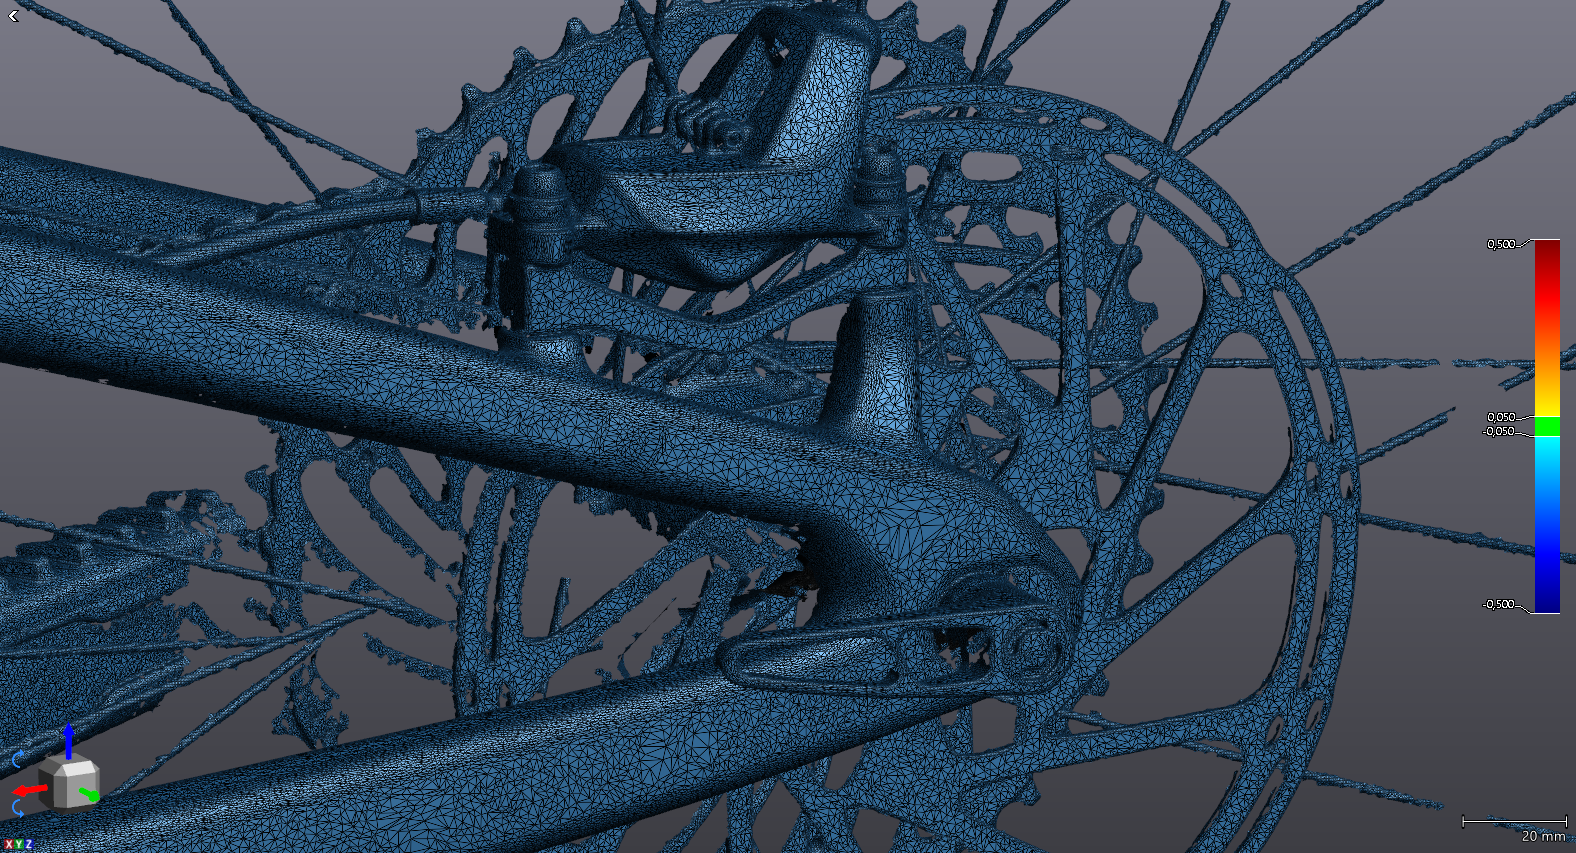
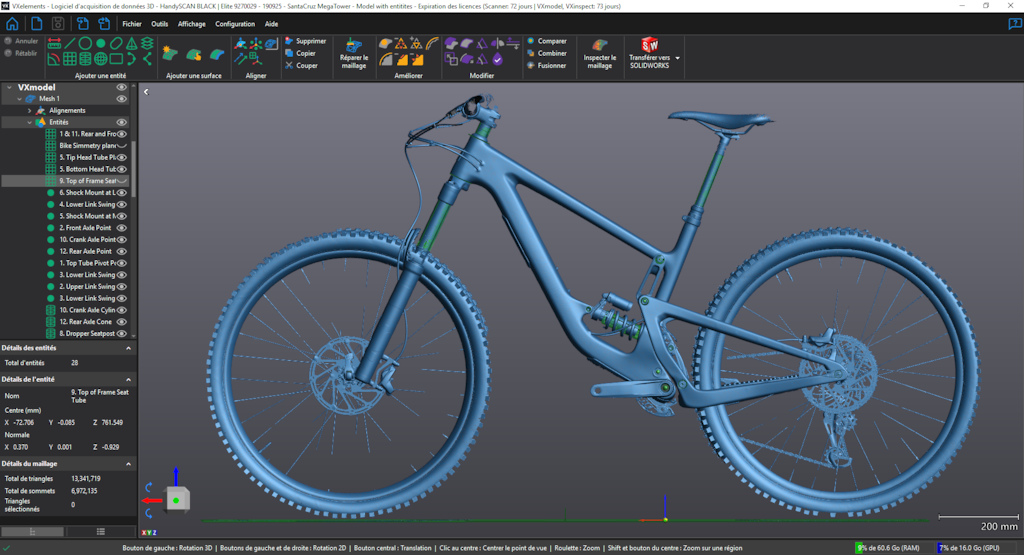
The output format of the scanned surfaces is commonly known as a mesh, or mesh file. It takes its name from the virtual look and feel of the 3D rendered object: a sort of woven net or wire mesh composed of millions of small triangular surfaces. For this project we used a triangle size of 0.35 mm to capture the details of the features we needed to extract but we decimated the mesh (i.e., we created large triangles on flat areas and kept small triangles on detailed areas). The HandySCAN 3D can provide a clean mesh surface with triangles as small as 0.1 mm. The latter build up to create the surfaces of the bike, regardless of their complexity. Zooming in on the components can be pretty revealing: the number of triangles that form the mesh varies depending on the level of detail needed and the area being scanned. You can refer to the visual below to observe the level of detail picked up by the scanner.
 |
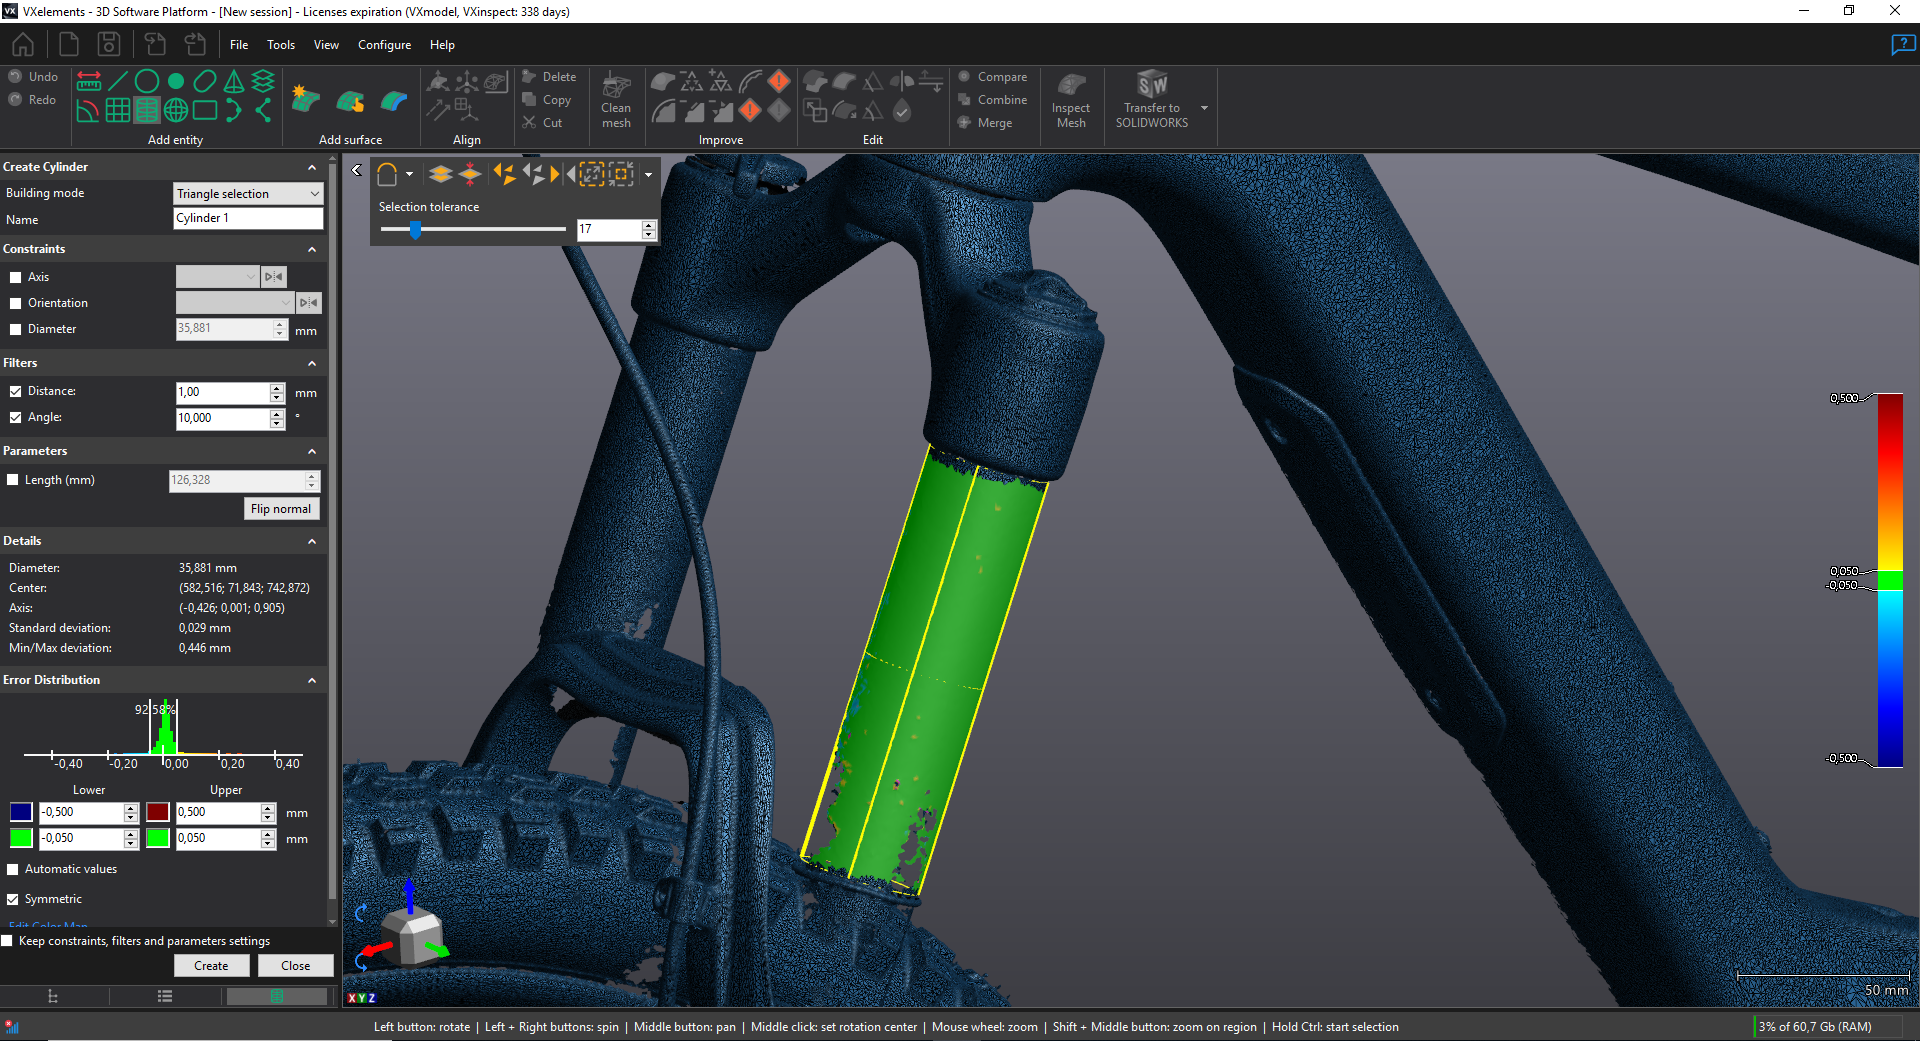 |
One particularly handy feature of Creaform’s overall solution is the live mesh. As the user is scanning the real-life object, the exact data being captured can be observed in the VXelements software interface. This translates to a readily available STL file for use with CAD software. Namely, the user can instantly see if a surface or a feature went missing throughout the scanning process.
As one might expect, the scan can be fairly heavy, data-wise, and so a decimated version can be used to speed up the whole process. In the present case, the main elements that needed to be picked up were the pivot points, axles and tubes of the fork and seat post. Ultimately, the data captured from the extracted points would be used to display the geometry and kinematics of the bike.
It sounds like a lot of effort to get just a 2D sketch of the bike,
but it’s remarkably fast and the accuracy is so damn good
that we monitor the tolerances of individual parts of the bike.
– pinkbike.com
4- Output and Export to CAD Software
For the scanning process to come full circle, the geometrical entities such as the pivot point can be imported directly into the user’s preferred CAD software using Creaform’s proprietary VXmodel software module. It integrates seamlessly with VXelements and thus enables the finalization of the 3D scan data. While the CAD software has all the design and modelling capabilities you need, VXmodel provides the tools needed for a quick and seamless integration into a scan-based design process.
Features and Benefits: Accurate, Fast, Versatile, Portable, No Surface Preparation
The “Behind the Numbers” series wouldn’t be reliable if it weren’t for the accuracy of the actual numbers put forth. Creaform provided Dan Roberts with the means (overseas!) to accurately measure something the team was striving to depict, i.e., short-linked suspensions.
Now in full control of the digits, Dan Roberts proceeded to in-depth kinematic analyses of short-linked bikes to determine the actual numbers for the leverage ratio, anti-squat, anti-rise, axle path and so on.
The scan itself took a time of about 15 minutes
and the whole process went from set up to final 3D model in under an hour.
– pinkbike.com
With the benefit of hindsight, we can safely assume that the readers can put their entire trust in the “Behind the Numbers” series, for the content contributors took the ultimate step to ensure accuracy and confidence for the measurement of all bikes and layouts.
In the end, the joint venture unlocked the provision of accurate data for short-linked suspensions, potentially paving the way for more efficient methods of positioning pivot points, closer to what was intended at the design stage. But in reality, they barely scratched the surface of the host of possibilities 3D scanning has to offer in the mountain bike industry.
If they have not tried or implemented it already, manufacturers of all sectors could benefit from 3D scanning technologies to validate concepts, inspect and compare components, and create intelligent product designs.
Pinkbike and Creaform would like to extend their gratitude to Santa Cruz for being open for discussion and instrumental in the chase for accuracy and consistency. The same goes to the Mathieu Performance bike shop in Québec City who were kind enough to let us play around with their Santa Cruz Megatower for this project. And lastly, thanks to Dan Roberts, the instigator of the Behind the Numbers article that refers to Creaform’s 3D scanning technologies. Former Senior Bike Engineer at Scott Sports, Dan Roberts founded Garage Bike Project, an engineering consultancy oriented towards the bike industry based in Champéry, Switzerland.