- Article
- Related
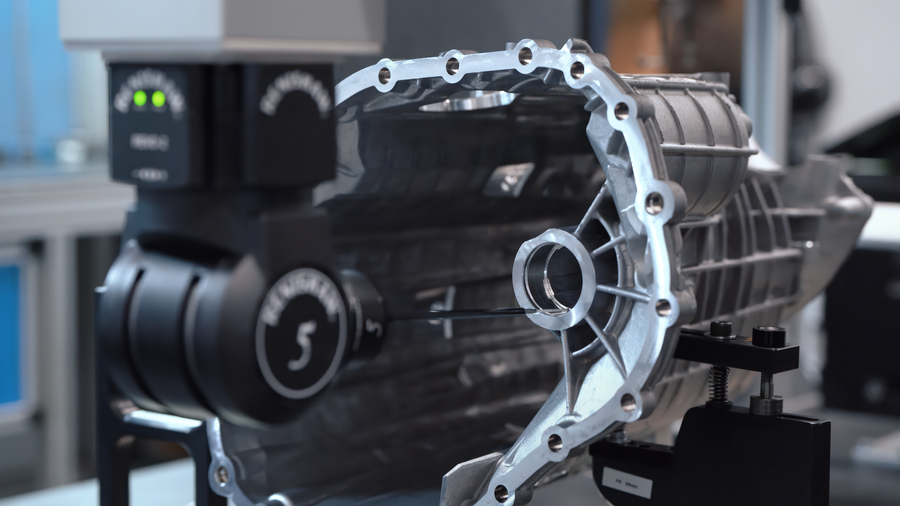
Foundries play a vital role in the automotive industry, particularly those specializing in aluminum castings for critical engine and structural components. Parts such as engine blocks, transmission housings, rear suspension arms, and subframes are essential to vehicle function and reliability. Because these components bear high mechanical loads and operate under demanding conditions, there is no room for error. Every casting must meet strict client specifications, with rigorous quality control at every stage of production.
Challenges
What is the risk of relying primarily on the coordinate measuring machine (CMM) for casting inspections?
When casting inspections rely mainly on the CMM, only a limited number of discrete points on the part are measured. This provides a partial view of the geometry, which can leave surface deviations or hidden anomalies undetected. As a result, critical defects may be overlooked, jeopardizing both quality and specification conformance.

How can entire geometries be inspected to ensure castings meet required tolerances?
Inspecting castings requires capturing multiple dimensions on parts with complex geometries—often in harsh environments. Unlike traditional touch-probing methods, 3D scanning captures the complete surface geometry, not just discrete points. By analyzing the full geometry, 3D scanners can verify whether material distribution is sufficient for subsequent machining, ensuring parts consistently meet tolerance requirements.
How can inspection time be reduced to accelerate the quality control process?
3D scanning captures the full geometry of a casting in a single session, allowing multiple dimensions to be inspected simultaneously with comprehensive data. This eliminates time-consuming point-by-point measurements and significantly accelerates quality control.
Inspection software then enables operators to instantly compare castings against CAD models. Deviations are clearly highlighted with colormaps, speeding decision-making and reducing manual inspection effort. Early detection of dimensional errors prevents defective castings from advancing in production, minimizing rework, scrap, and unnecessary machining or assembly.
Additionally, 3D scanning requires no surface preparation, allowing parts to be inspected directly on the production floor without moving heavy or bulky castings to a metrology lab. This reduces handling time and provides faster feedback to production teams, further streamlining the quality control process.

Solution: Portable, Highly Accurate, Fast, and Versatile 3D Scanning for Casting Inspections
3D scanning provides foundries with a portable, highly accurate, fast, and versatile solution for measuring, inspecting, and validating castings at every stage of production.
Portability
Handheld 3D scanners can be brought directly to parts on the shop floor, eliminating the need to transport castings to the CMM. This saves valuable time and allows operators to perform more inspections with greater efficiency.
High Accuracy
ISO 17025-certified metrology-grade 3D scanners deliver the accuracy required to measure intricate cavities and detect even the smallest deviations from specifications. With dynamic referencing, they maintain accurate measurements in challenging shop-floor environments, remaining unaffected by vibrations, temperature variations, or other common foundry conditions.
Speed
3D scanners capture the complete geometry of castings in minutes. With colormaps, quality control can instantly compare parts against CAD models, validating dimensional variations far faster than with traditional measurement methods. This rapid evaluation reduces inspection time and accelerates production throughput.
Versatility
3D scanners handle a wide variety of parts, regardless of size, shape, geometry, or complexity. They can also measure difficult or contrasting surface finishes without any part preparation or surface treatment, ensuring consistent results across all castings.
Metrology-grade 3D scanners, such as HandySCAN 3D, and inspection software, like PolyWorks, are good examples of such portable, highly accurate, fast, and versatile 3D scanning solutions.

Benefit: Every Casting Scanned in Detail for Superior Quality Control
With 3D scanners, even the most complex geometries can be verified before the part approval process begins, ensuring every casting meets the client’s exact specifications.
Shop-Floor Quality Inspection with No Preparation Required
Foundries can now inspect castings directly on the production floor without compromising accuracy or requiring surface preparation. With 3D scanners, quality control teams spend less time on training, handling, and programming than with CMMs, while acquiring more comprehensive data on more parts in less time.
Better Part Quality
Inspections performed at every production stage clearly identify issues such as insufficient material in critical areas or deviations from the CAD model. This proactive approach ensures castings consistently meet customer specifications and stay within required tolerances.
Reduced Inspection Time
3D scanning reduces inspection time from hours to minutes—all while maintaining an accuracy of 0.025 mm. This streamlined process can save up to 30 minutes per casting, enabling defects to be identified with confidence. The resulting efficiency allows more parts to be produced and inspected in less time, leading to faster customer delivery.

Client: Martinrea Honsel Spain
Located in the industrial heart of Madrid, Martinrea Honsel Spain has been a key player in the automotive sector for more than six decades. Founded in 1960, the aluminum foundry manufactures components for engines, transmissions, chassis, and body structures of cars and commercial vehicles, as well as parts for mechanical engineering and other applications.
Throughout its history, Martinrea Honsel has combined continuity with innovation, consistently transforming customer requirements into advanced processes and products. The result: components that deliver high strength, exceptional dimensional accuracy, and superior surface quality.
To further raise its standards, Martinrea Honsel Spain has recently adopted full-part scanning using Creaform metrology-grade 3D scanners. This new approach enables more detailed inspections, faster validation, and enhanced quality control.
Looking ahead, the company plans to extend this capability to larger surfaces—such as die cavities and frames—continuing to push the boundaries of quality and efficiency.
NEED MORE INFORMATION ABOUT OUR SOLUTIONS?

