- Article
- Related
You work in quality control for manufactured parts and assemblies—some of which have complex geometries and difficult surfaces. You aim to inspect these parts with high accuracy and fine detail, without having to constantly rely on the coordinate measuring machine (CMM), which is often tied up with various other controls. Most importantly, you want reliable measurements you can trust—data that accurately reflects the part’s condition, so that if dimensions are out of tolerance, you can act with confidence instead of questioning the measurement itself.
If this sounds like your daily reality, the blog below is definitely worth a read.
Is the Problem in the Part—or the Measurement?
When a quality issue is reported on a part, how can quality control (QC) and quality assurance (QA) professionals determine whether the problem results from a manufacturing defect or in the validity of the inspection data itself?
How can they be certain the measurement data is both complete and reliable?
How can they know the part was scanned thoroughly—and with the accuracy required?
Ultimately, how can they eliminate doubt and trust their inspection results with absolute confidence?
When doubt arises, it's often easier to question the accuracy of the inspection data. With any luck, operations will continue uninterrupted. But if a corrective action was truly needed, the quality issue may escalate—leading to production delays, costly rework, or even product recalls.
To mitigate these risks—and, more importantly, to perform their responsibilities effectively—QC and QA professionals must rely on inspection data they can trust. Only with accurate, reliable measurements can they make confident, informed decisions to address manufacturing challenges.
The Creaform Solution to Validate Part Quality with Confidence
With this challenge in mind, Creaform developed the HandySCAN 3D|EVO SeriesTM. The goal: to enable QC and QA specialists to perform dimensional inspections and validate part quality with confidence—even on complex geometries and difficult finishes—based on verifiable and trusted specifications that meet the industry's strictest requirements.
By delivering consistent data and accurate results—backed by ISO/IEC 17025 in-house laboratory accreditation and based on the ISO 10360 certification—the HandySCAN 3D|EVO Series removes ambiguity from the inspection process. It ensures that quality issues are correctly identified and understood—not underestimated or ignored. Whether the problem lies in the part or the process, QC and QA specialists can trust their measurements to tell the true story.
The solution gives QC and QA professionals the certainty they need to make the right calls—at the right time—before quality issues escalate. It’s not just about capturing data; it’s about capturing right enough data, every time.
The Four New Key Features of the HandySCAN 3D|EVO Series
The HandySCAN 3D|EVO Series also offers new key features developed by Creaform engineers to provide a fully integrated solution, redefine ease of use, and empower new users to quickly master the technology, all while also meeting the needs of the most advanced users.
Embedded GUI for a More Intuitive Workflow
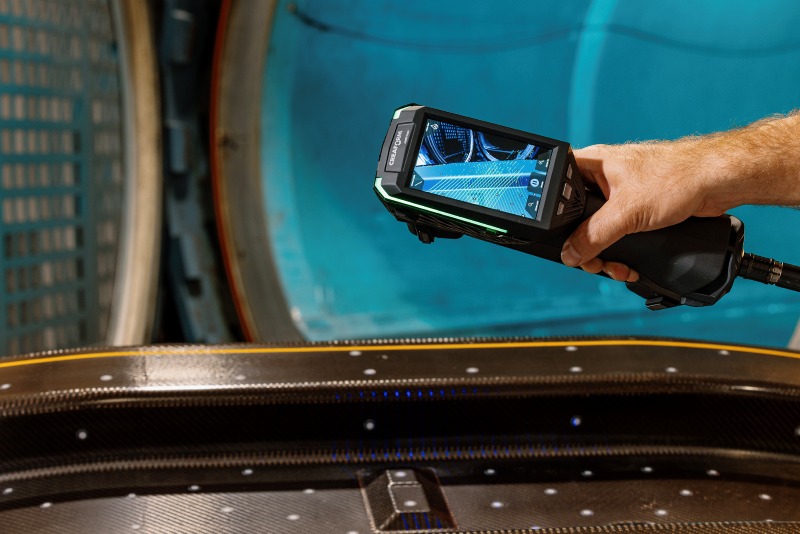
Featuring a powerful embedded graphical user interface (GUI), the HandySCAN 3D|EVO Series was engineered to streamline the scanning process and enhance ergonomics. By aligning the user’s line of sight with both the physical part and the scan data, it enables more intuitive data acquisition and a significantly more comfortable experience.
The integrated display offers real-time visual guidance to simplify onboarding, instant access to scanning parameters, and in-sight 3D indicators that confirm data completeness on the spot.
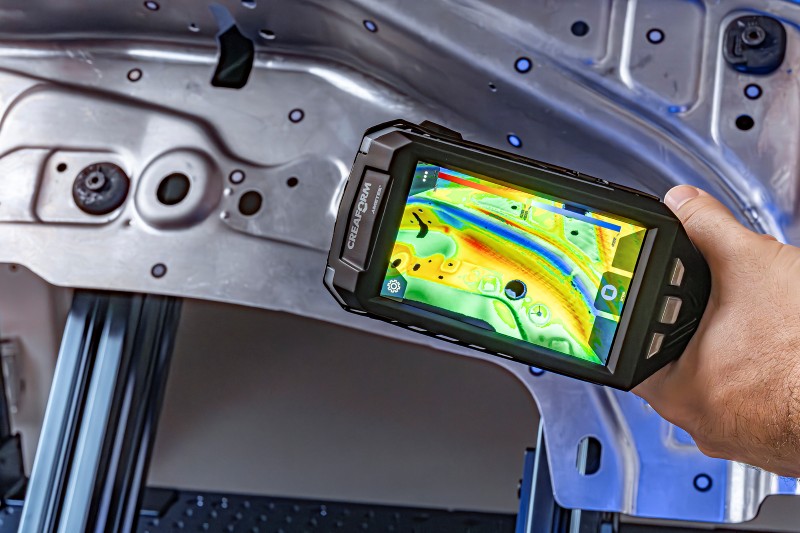
This thoughtful ergonomic innovation minimizes the need to constantly switch attention between the 3D scanner and the computer. It also improves visualization, facilitates data validation, and allows users to track deviations in real-time using the colormap.
In the next video, Product Manager Pierre-Luc Delagrave guides you through the embedded GUI, explaining its purpose, functionality, and the value it brings to field inspections.
Augmented Reality and Auto-Alignment for Smarter Inspection
By integrating augmented reality, the HandySCAN 3D|EVO Series elevates inspection efficiency and clarity during scanning. Operators can visualize the mesh as it’s being generated directly on the physical part, allowing them to stay focused and easily identify areas that require higher resolution. Augmented reality also enables the superimposition of the colormap onto the part, instantly highlighting deviations from the CAD model.
In addition, augmented reality facilitates automatic alignment of the scanned part with the CAD reference, removing extraneous data and performing automatic cleanup—minimizing the need for manual scan post-editing. These functionalities are seamlessly integrated to support repeatable and streamlined inspection workflows.
Watch as Product Manager Pierre-Luc Delagrave explains how the augmented reality feature works, what it’s designed to do, and how it enhances the user’s workflow.
Integrated Photo Camera for Enhanced Documentation
This scanner also includes a built-in photo camera that empowers QA and QC professionals to document part assessments faster and with better clarity and efficiency. High-quality images can be captured directly during the inspection process—eliminating the need for separate equipment or time-consuming manual steps.
Beyond inspection, this feature also supports reverse engineering workflows. Photos can be automatically linked to the 3D model, allowing users to visually capture design intent, surface conditions, or specific geometric details. This enriched visual context helps streamline redesign efforts, improve team communication, and create more complete, traceable project records—all within a single device.
In this video, Pierre-Luc Delagrave presents the integrated photo camera, highlighting its role, its operation, and how it improves documentation.
Wireless Connectivity for Powerful Mobility
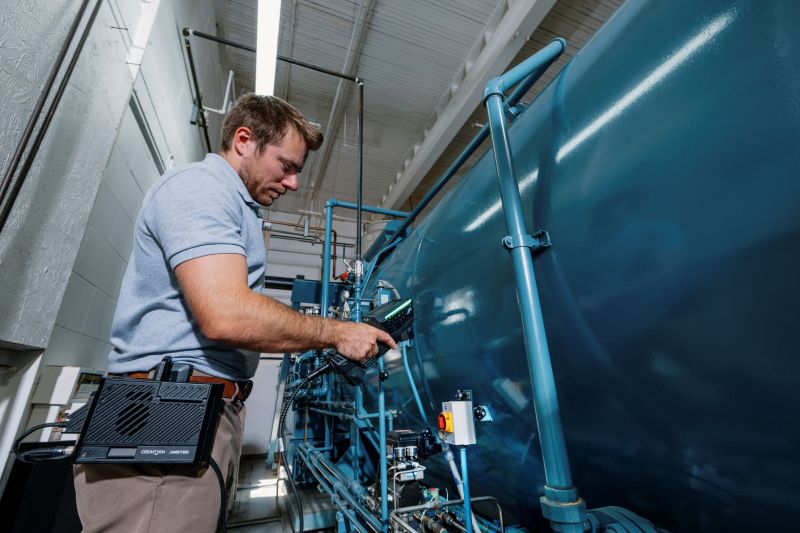
The scanner can also be paired with the Mobility Kit to form a fully mobile 3D scanning solution — without compromising Creaform's flagship metrology-grade qualities. Users benefit from the same renowned portability, proven reliability, and unmatched, accredited accuracy that define the brand.
This wireless configuration eliminates the need for external power sources, bulky laptops, and long cables, giving QC and QA professionals complete freedom of movement on the shop floor or in remote environments. And as real-time scan data and guidance are displayed directly on the 3D scanner’s integrated interface, operators can monitor data acquisition and make adjustments instantly—without interrupting their workflow.
Confident Decisions Start with Trusted Data
For QC and QA professionals, the ability to make informed decisions hinges on the reliability and accuracy of their 3D measurements. When results are uncertain, so is every action that follows. That’s why the HandySCAN 3D|EVO Series was purpose-built to eliminate doubt—empowering you to perform dimensional inspections with confidence and clarity, even on the most complex parts.
By introducing a powerful embedded GUI, integrated photo documentation, real-time AR with auto-alignment, and full wireless mobility, the HandySCAN 3D|EVO Series increases user confidence in portable 3D metrology. Each feature is thoughtfully designed to enhance usability, accelerate workflows, and ensure data you can trust—wherever and whenever quality needs to be verified.
With the EVO Series, you get more than a 3D scanner. Paired with the Creaform Metrology Suite, you get a complete solution for delivering trusted, verifiable results that meet the industry's highest standards—helping you overcome today’s manufacturing quality challenges with confidence and clarity.
Published 09/21/2025


