- Article
- Related
Ever since 1992, AGT has been a leader in the development and the manufacturing of automated industrial equipment. Renowned for know-how and innovation, the company is more specifically specialised in robotics, in fabricated parts as subcontractors, and in the manufacturing of complete automated production lines and customised machinery.
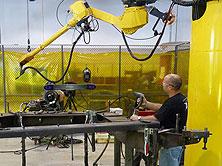
Recently, AGT was required to manufacture a welding jig for fabricated parts used in building the loading arm of a garbage truck, which would lift steel garbage containers. Technically, the project aimed at measuring and adjusting plan A (primary reference), cylinder B (secondary reference), and cylinder C (tertiary reference) of the jig. The company also needed to ascertain the position of other parts on the jig.
Recently, AGT was required to manufacture a welding jig for fabricated parts used in building the loading arm of a garbage truck, which would lift steel garbage containers. Technically, the project aimed at measuring and adjusting plan A (primary reference), cylinder B (secondary reference), and cylinder C (tertiary reference) of the jig. The company also needed to ascertain the position of other parts on the jig.
To achieve this quality control project, AGT chose to call upon metrology and inspection experts from Creaform. After analysing the project, these experts agreed that any measuring system used for the project would have to conform to two main requirements: the capacity to continuously locate the part, since it would never be completely immobilized, and the capacity to measure in a vibration-filled environment, since the inspection had to take place at the AGT plant. After having weighed the pros and cons of traditional measuring technologies (optical CMM and measuring arms) with regards to the various steps of the project, the Creaform metrologists chose the HandyPROBE arm-free, optical CMM system.
HandyPROBE: Inspection Made Simple
Could the work have been done with another type of CMM? Of course, since the Creaform metrologists could have chosen a conventional measuring arm. However, would the process and time frame have been the same?
Absolutely not!
Using a conventional measuring arm would have required leapfrogging, a procedure that would greatly lengthen the time required for the metrologists to perform the work. As another disadvantage, every single readjustment on the jig by the toolmakers would have resulted in having to realign the measuring equipment, while trying to maintain a precision equal or lower than the one HandyPROBE has to offer.
By choosing the portable, arm-free CMM system HandyPROBE, the metrologists made sure they could count on functions such as automatic realignment and continuous tracking of the part despite any ambient vibrations.
Solid Arguments
On top of these factors, the HandyPROBE measurement volume extension function became very useful, since the part to be measured (the welding jig) was bigger than the basic measurement volume. The measurement volume of the HandyPROBE may even be easily and dynamically extended without any loss in precision and without the need for conventional leapfrogging; such advantages help to considerably lower the number of times the equipment has to be reinstalled, and thus lower the accumulation of error.
In order to properly adjust the jig, toolmakers had to hit it with a hammer to insert or remove the stops. With a traditional CMM system, such manipulations would have ruined the alignment of the entire installation, making it necessary to realign everything every single time. For the AGT jig, the “Dynamic Referential” mode of the HandyPROBE became particularly useful. The HandyPROBE allows the operator to choose the Dynamic Referential mode, in which both the C-Track and the part may be moved during the measuring procedure without any loss in precision or tracking.
This last characteristic proved particularly useful in this project, since it allowed the jig to be measured even though it was constantly vibrating, without any need for a rigid installation or interruptions in the measuring sessions.
When the Creaform metrologists chose the HandyPROBE portable arm-free CMM system, they helped AGT to save time and money, and to obtain better measurement information. Consequently, AGT was able to deliver manufacturing welding jigs that fulfilled the expectations of their client.
Article written by Creaform
Recent Posts
Filters
Reset


