- Article
- Related
First article inspection (FAI) is a crucial step in the manufacturing process. The quality control (QC) team needs to optimize this phase of inspection in order to limit the back and forth between conception and fabrication. The QC team must not only correctly identify the defects, but also provide relevant data, measurements, and results for solving the identified problems.
Too often, quality managers are seen as those who seek and find problems—information that we obviously would rather do without. However, if the implementation of effective tools could enable them to not only identify problems, but also to find viable solutions, it would help production to progress more quickly, and the first articles could be delivered without delays and complications.
This blog explores the evolution of new technologies and their ability to facilitate the work of quality managers. It also explains how FAI enables the founding of a stable manufacturing process that can deliver compliant parts of good quality that precisely meet customer requirements.
WHAT is First Article Inspection (FAI)?
As its name suggests, FAI requires the complete inspection of parts before starting mass production. Primarily used on new products and designs, it ensures that the manufacturing process correctly interprets the design intent. It also provides customers with the documentation required to demonstrate compliance with the contract and specification requirements.
WHY is FAI important?
FAI aims to uncover manufacturing problems and catch errors before they become costly to fix. Consequently, it helps lower return rates and reduce costs associated with rework. It also contributes to improving customer satisfaction and increasing profitability.
WHY is FAI challenging?
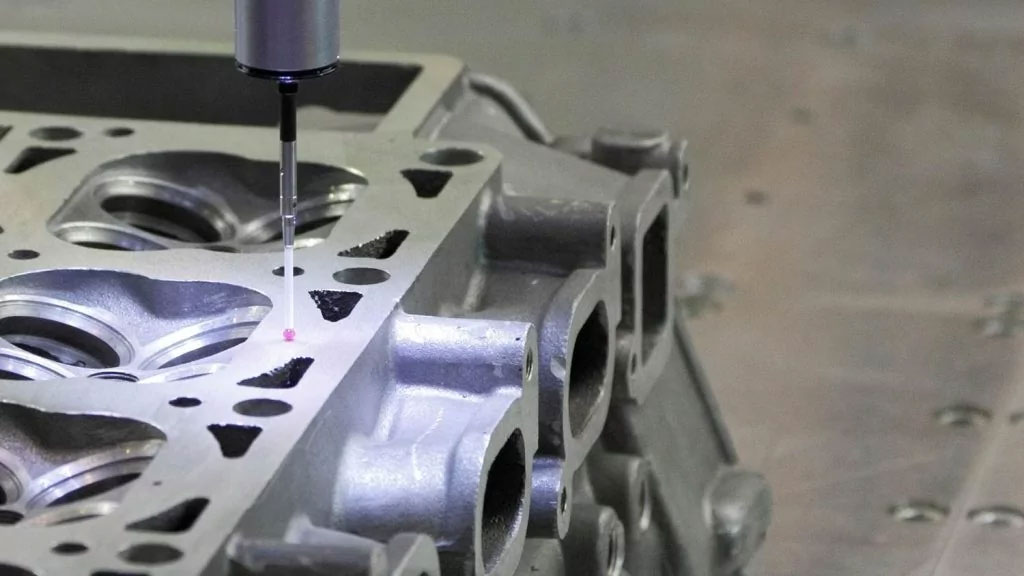
Nevertheless, performing FAI on newly developed parts is challenging. Since all features must be measured and verified, it takes time—a lot of time—especially if the complete FAI is performed on the coordinate measuring machine (CMM). When the CMM is unavailable due to bottlenecks generated by controls on less important features, both part quality and production lead time are impacted negatively.
The problem is that the more new parts there are (as it is often the case with new programs), the more FAIs there are to execute, and the more CMM time—and human resources to operate them—must be available, often in a short period of time.
HOW to avoid bottlenecks at the CMM?
The CMM is widely popular for FAI due to its high accuracy. In fact, the CMM has always been the reference measuring equipment for metrologists. This substantial demand comes with some drawbacks.
The CMM must not only be available for the FAI of newly industrialized parts, but also it must be vacant to perform any type of inspection, particularly on critical dimensions. When performance criteria and tolerances are tight, metrologists prefer to control key features with the CMM. However, since it must be programmed and handled by specialized workers and is slow to operate, an accumulation of quality controls can create significant bottlenecks, which delay the progress of the manufacturing process.
Consequently, accessibility to the CMM is essential to guarantee the FAI of critical dimensions. To do so, redirecting less critical controls to another metrology instrument—simpler to learn and use—enable the QC team to avoid costly bottlenecks at the CMM, which remains the first stop for high-tolerance features.
HOW to perform FAI in the context of globalization?
Furthermore, FAI is now performed in the context of globalization. Products are now made of hundreds of components manufactured by a myriad of subcontractors and suppliers who are based in diverse locations around the world and use varied manufacturing processes. Once assembled, all components must fit together and align correctly to produce viable products free from defects that could distort their performance and ruin their efficiency.
To illustrate that, let’s consider a part designed by an automotive manufacturer in Europe. The numerical model is first sent to a subcontractor in Asia, who moulds and produces the part that will be sent and assembled on cars at a plant in South America. FAI is performed by the car manufacturer, who will attempt a first assembly and highlight the defects. Those incongruities will be referred to the subcontractor, who will correct his tooling before sending a new sample to the factory. Once again, components might not fit properly. Once more, the subcontractor will be asked to adjust the tooling. And so on, for a long round trip!
If, however, there were ways to scan the part and send its digital model instead of physically sending it halfway around the world to measure it on the CMM, we would gain both efficiency and time. We could then proceed with a virtual assembly and virtually estimate the corrections without making parts physically travel around the world.
WHAT is the best alternative to the CMM?
To improve, optimize, and accelerate FAI, manufacturers need an alternative measuring solution to support the CMM and provide QC professionals with the required accuracy, speed, portability, versatility, and simplicity.
-
- Accuracy: The measurement quality is essential to take on inspections previously assigned to the CMM. The alternative solution must provide accurate, high-resolution, and repeatable results regardless of the measurement setup quality. Measurements taken on the shop floor must also be insensitive to environmental instabilities. This means that, even if the part moves, vibrates, or oscillates during the inspection, the measured data is accurate and independent of a rigid measurement setup.
-
- Speed: Since the CMM is slow to operate and takes time to program, the alternative solution must perform faster. It should also offer quick setup, real-time scans, and ready-to-use files, allowing QC professionals to accelerate FAI and save precious acquisition and analysis time, limiting production downtime.
-
- Portability: As investigations on the tooling often occur directly on the production line, QC specialists must be equipped with a device capable of operating in various environmental conditions without affecting performance or impacting accuracy. Unlike the CMM, which must be kept in a controlled environment, the alternative measuring instrument must have the flexibility to be brought wherever the part is.
-
- Versatility: To ensure product quality and improve diagnostics, the alternative solution must also have the capacity to measure various object sizes and shapes with complex geometries and surface finishes, which have become almost the standard for newly designed parts.
-
- Simplicity: Finally, the alternative measuring instrument must be intuitive to learn, easier to use, and not require extensive programming time so that people with no special training, skills, or experience can operate it.
WHAT to expect from 3D scanning technology for FAI?
Simply put, 3D scanning technology meets all these requirements and figures as the no.1 alternative solution to the CMM. Here is why:
Accurate Shop-Floor Measurements
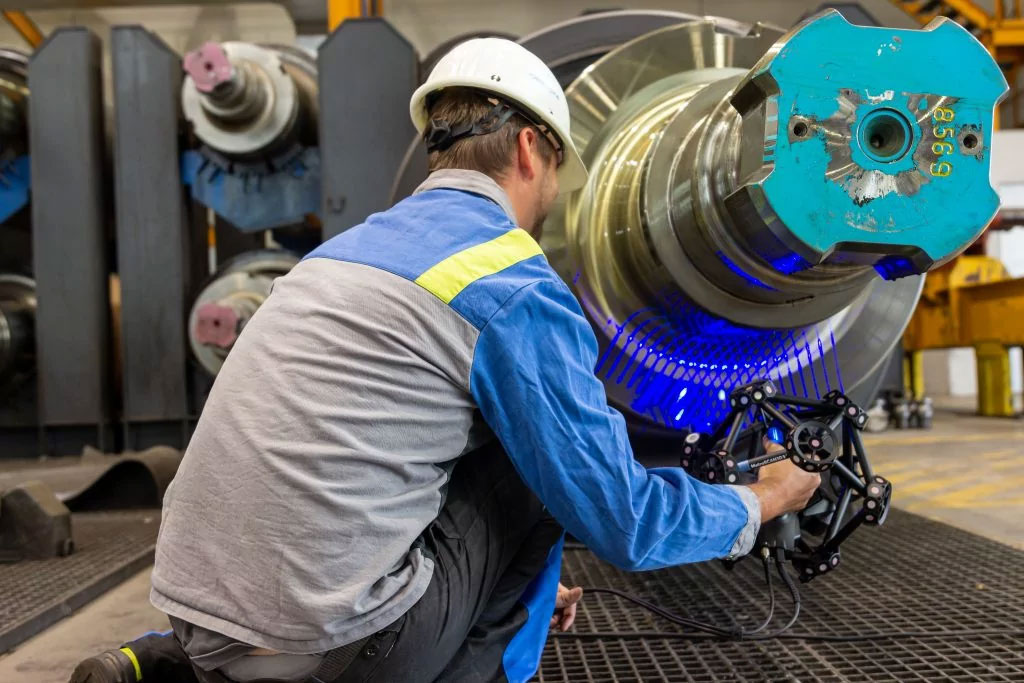
3D scanners enable the QC team to go directly to the production floor and perform FAI at any time, thus eliminating wasted time and reducing the costs related to moving a defective part from the workshop to the CMM. Because they can measure parts in shop-floor environments—often influenced by temperature variations, vibrations, and oscillations—and can be moved around the production floor without impacting their accuracy, metrology-grade 3D scanners, such as the Creaform MetraSCAN 3D, are perfect for performing FAI on large and heavy parts and less critical features.
Short Learning Curve
With their user-friendly interface and ergonomic design, 3D scanning equipment have a short learning curve and are easy to use. With their faster setting and acquisition time, metrology-grade scanners, such as the HandySCAN 3D, offer detailed analyses accessible to non-specialists in metrology. This accessibility and ease-of-use can limit delays in detecting and correcting the first parts’ defects.
High Information Density for Detailed Analyses
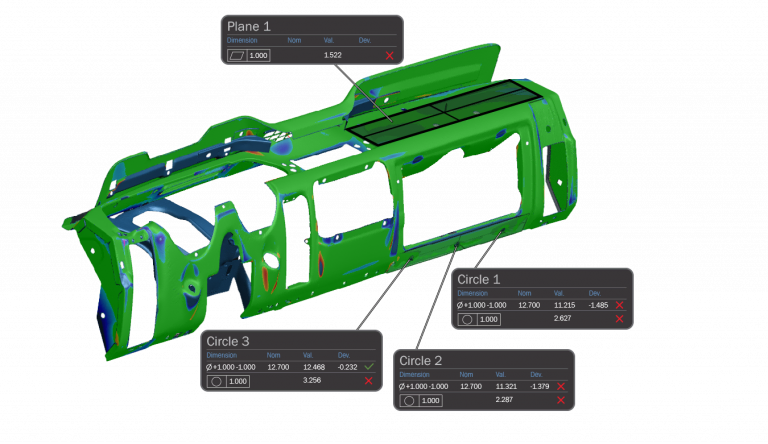
With 3D scanners, the QC team can now digitize complex shapes with a large number of data and without contact, allowing a more detailed analysis of FAI. Colormaps can quickly reveal where defects have appeared in the manufacturing process and which machine setting has created them. Information density accelerates problem-solving and decision-making in link with the first articles.
Finally, 3D scanners are a huge step forward for FAI in the context of globalization. 3D scanning technology would even allow a purely virtual FAI in which the first physical parts would be compatible on the first try. The current technology has the capacity to enable it. It is simply a matter of integrating this new know-how into the manufacturer’s training, culture, and mentality.
3D Scanning for Improved, Optimized, and Accelerated First Article Inspection
By adding a metrology-grade 3D scanner to the measuring instrument kit, delicate inspections of high-tolerance features can be assigned strictly to the CMM, while all remaining controls can be redirected to 3D scanning. This action not only ensures product quality through the global supply chain, but also improves diagnostics on reported quality issues and accelerates FAI, even if the company is struggling with limited resources and strict requirements.
Furthermore, 3D scanning solutions optimize FAI by reducing the bottlenecks at the CMM and the time required for adjustments before mass production. Consequently, an optimized FAI enables quality control to quickly identify issues and promptly propose solutions. The first parts are then of higher quality, compatible with their assembly on the first try, and they meet customer requirements, thus generating greater satisfaction, sales, and profitability.
Published 05/18/2023


