


November 1, 2022
How to Measure Flatness: A Straightforward Guide for Professionals See the articleIn my duties as Product Specialist, I am part of the main entry point for customers with technical questions or problems. The Tips and tricks section aims to present questions (and solutions!) taken from everyday life asked by some of our customers. In order to help a large number of people, we aim here to explain the questions as well as the answers provided.
I recently received a question merging scans of a car in order then extract the symmetry plane of the resulting scan. Using Geomagic Studio 11 this task is pretty simple and is presented below. In this case, we assume that we have several scans which have to be merged together (for example, if the body of the car and the wheels were scanned separately).
- Clean each partial STL and make sure you have only relevant data (i.e. remove the blocks under the wheels and noise which might be floating around). In order to clean noise easily, it is possible to use the Open Manifold command.

- Since the scans were scanned in the same referential with the Handyscan 3D, there is no need for an external alignment of the different scans together. When each scan is imported in Geomagic Studio, they will already be correctly aligned, but will be present as separate objects.
- Try to make sure that you have as less overlap as possible in order to minimize the risks of having overlapping layers of scan which might cause problems during the merge of the scans. This is especially true when you have scans with different resolutions (e.g. coarse resolution on the car body and a higher resolution mesh for the wheels).
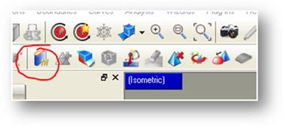
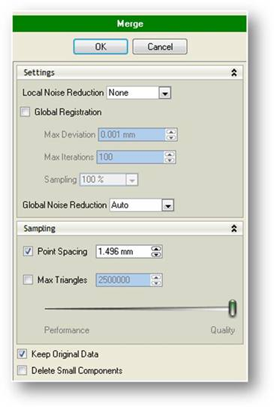
- In order to merge the scans together, what we usually use is the function Merge, located in Polygons | Combine | Merge. When using this function, make sure that Global Registration is unchecked (as the registration is already done directly in the scan) and that point spacing is check with an appropriate value for your STL. This will sample the points on the surface and rewrap it in order to make smooth transitions. Some adjustments might be needed in order to find the optimal settings for you data. Also, make sure to check Keep Original Data so you can go back to the original data in case something goes wrong.

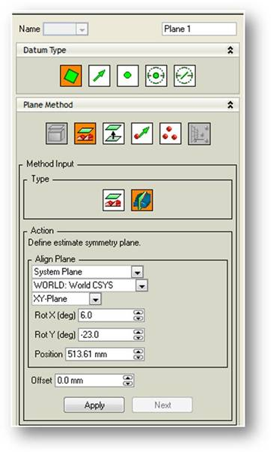
- When the scans are all merged, it is possible to create a symmetry plane. In Tools | Datum | Create Datum, there is an option for the symmetry plane. You will need to place manually a plane which would be close to the real symmetry plane of the object in order to help the software in its calculations. Then, click on Apply and Next in order to save the plane.

- Finally, in order to create an alignment, you can do it directly in VxScan 3.1, if it is not to late. In the Entities menu, theAlign function will automatically put a reference system in the center of the object, relative to the main axes of your object. Then, when importing the object in Geomagic, it is important to keep it pinned and make sure that all other scans are aligned to this part. If for whatever reason doing this manipulation in VxScan is not an option, it is possible to do it in Studio with the Alignment to World function.
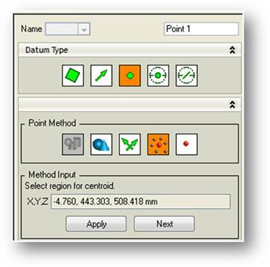
- First, 3 datums will need to be created: one plane, one line and a point. These will allow to define the orientation of the axis system.
-
- If the origin has to be located at the center of the scan, the point has to be created with being the Centroid of a selection, in this case, the whole scan.

-
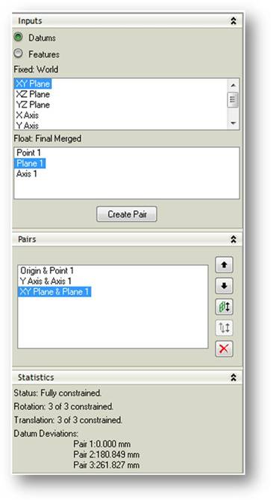
- When all the datums are created, it is now possible to align the scan to the world referential with the Tools | Alignment | To World function. Then, create pairs between the world reference system and the datums which were created earlier.

The end result will be the STL file, with the symmetry plane in the middle and aligned to a coordinate system located in the middle of the scan.

- First, 3 datums will need to be created: one plane, one line and a point. These will allow to define the orientation of the axis system.


22 Sep '09
Tom Charron
Julien, Can you show how to do this same process in Rapidform?
22 Sep '09
Julien Marchand
Hi Tom, Yes, I will show the same process in Rapidform, it will be the subject of a (quite near) future post. In this case, I took Geomagic as I adapted a real-world answer I made to a customer, but it will be interesting and important to show sucha common process in many software packages.
22 Sep '09
Ken Murphy
Could you do aircraft parts like complex 5-axis milled, and skin panel surface with fastener axis locations demos? Reverse Engineer them using the HandySCAN and HandyPROBE. Then working the scan in Geomagic, Polyworks, Rapidform, etc. and showing the differences of these softwares to get to the end result of a 3D solid model for manufacturing and FEA. Then using quality checking software to compare 3D CAD model to scan data. I have a HandySCAN/Zscanner 800 and would like ideas on the kinds of parts that this scanner is best suited for. I'll have to get an onsite demo of the HandyPROBE. Thanks for going blogs. It's great for users of all skill levels.
23 Sep '09
Julien Marchand
Hi Ken, This process might be a little long winded for a (single) blog post... :) However, I intend to write articles about various subjects which, when all combined, will get you up to the result you want. From data acquisition, to post-processing and to the final deliverable result, it's all part of a nutritous breakfas.... errr... the complete workflow when dealing with 3D information. Thanks for the comments, it's always appreciated on our side...!
23 Sep '09
Ken Murphy
Yes, I concur. You know what I was going for. Articles about the different steps, when put together, gets you your final product. Using the different software for each article is a good idea. Please email me when you write these articles. On this site, could you have an "auto responce" email letting me know you responded to my post. How about having a way to comment back to you via your email address, etc. without being posted to this blog site. Thanks for the quick responce.
23 Sep '09
Julien Marchand
You can subscribe to the blog posts with the RSS feed, located at the top right of the page. Some sort of subscription by email would bea nice idea also, we'll see what we can do about this.
6 Jan '11
Zereen
Hi, I have 12 .3pi files (scanned from 12 different angle) and I need to merge them (so that I can get 1 3D view). I am completely new to Geomagic Studio. Can you please explain how I can merge them. Btw I tried to merge them but I am a bit confused regarding picking a similar point. As the 12 images are from 12 different angle, I couldn't decide how can I find a similar point. Please help. Thanks in advance.
10 Jan '11
Julien Marchand
Hi Zereen, You will find more information directly on Geomagic's support website at http://support.geomagic.com. You will want to go to the knowledge base and search for topics on Alignment. These will give you more information, tutorials and how-to.