The example shown here explains this concept applied to a seal compression analysis in the automotive industry.
Using the dynamic referential of the Creaform Handyscan 3D, it is possible to acquire hidden surfaces of assemblies as if in the assembled configuration. With traditional measurement devices, moving parts from an assembly results in a misalignment and a referential loss.
Step 1
 Creating a common positioning model of the assembly in the Assembled position using the Scan Positioning Targets option.
Step 2
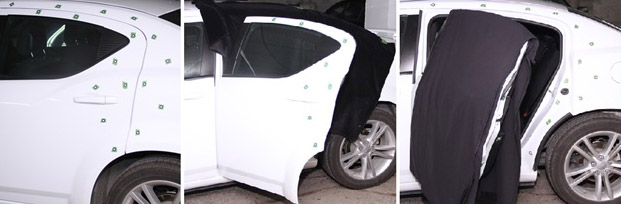
 Split the components so that the hidden surfaces become accessible. Add targets around the door seal. Add target on the inside surface of the door.
Step 3
Using the Scan Surface option, acquire the surface of the components individually. To do so, hide the targets of the other components or dismantle the parts completely. Start scanning at a known location and reach for the new targets and details. In this example, the door was scanned in the open position and the door frame was covered.
Step 4
In a new session, using the same positioning model, repeat the same operation with the remaining part.
How it works
The key feature here is the capacity of the system to recognize the positioning model even if it is divided in 2 or more parts. To do so, each individual part must have at least 4 targets remaining and recorded from the original model.
As you can see, even if each component was acquired individually, when loaded simultaneously, both parts show up in the assembled configuration.

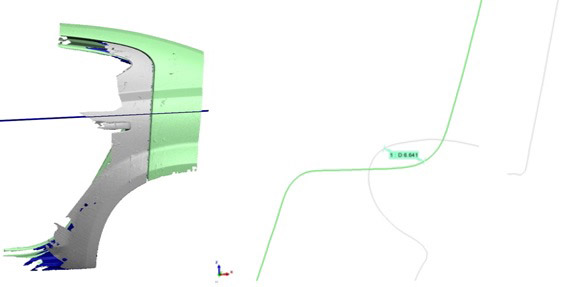
Analysis
Open the 2 different geometries into your analysis software. By using one or multiple cross sections along the rubber seal path, it is possible to analyze the intersection between the 2 parts.